A useful kitchen recessed lighting layout starts with counters, appliances, and cabinet faces, not evenly spaced ceiling rows. Plan each light around a task or visual purpose, then adjust the pattern so the ceiling feels balanced without resembling a runway.
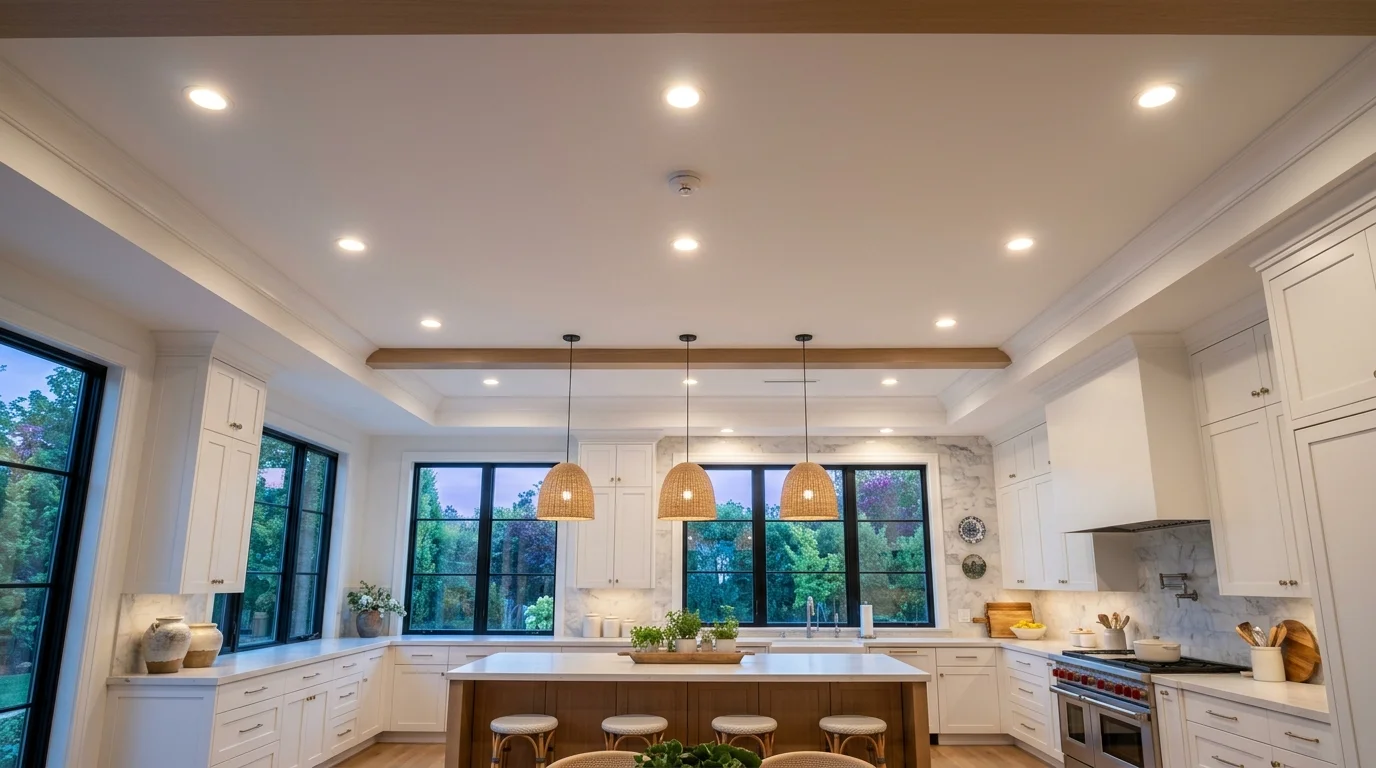
Start with the work surfaces
Begin with a scaled floor plan and cabinet elevations. Mark the sink, cooktop, prep counters, pantry, refrigerator, island, and main walkways. Then decide where clear overhead light matters most.
Countertops deserve attention before open floor space. A downlight centered in an aisle may look orderly on paper, yet place the person cooking between the light and the counter. The better plan positions task lighting with the work surface in mind. Cabinet depth, crown molding, and open shelving all affect that decision.
Treat the sink and cooking area as separate work zones. The same applies to an island with both seating and food preparation. A light serving the seating edge may not serve the working edge. Each role should be clear on the plan.
Next, check every downlight against the cabinet layout. Avoid placements that wash one cabinet door while leaving the neighboring door visually quiet. Also check tall pantry cabinets and refrigerator panels. These vertical surfaces can make an otherwise even ceiling plan feel lopsided.
A kitchen design plan helps coordinate lighting with cabinet lines before ceiling openings are marked. It’s especially useful when a wall, island, or appliance location will change. Finish those layout decisions first, then build the lighting plan around them.
Walk through the room at different times of day. Whether the kitchen is in Encinitas, El Cajon, Chula Vista, or central San Diego, evaluate its actual daylight rather than assuming a countywide condition. Note where daylight helps, where glare appears, and where the room feels flat after sunset.
Spacing rules and ceiling height
Spacing rules are starting points, not a finished kitchen lighting plan. Fixture output, beam shape, ceiling height, cabinet color, and room geometry all affect the result. That’s why a single spacing formula can create disappointing bright and dark patches.
Start by drawing zones instead of rows. One zone may cover perimeter counters. Another may serve an island. A third may support circulation near a pantry or doorway. Place lights within those zones, then review the whole ceiling for awkward lines.
Ceiling height matters because it changes how each fixture’s light reaches the room. Don’t select spacing from ceiling height alone. Use the chosen fixture’s manufacturer data and the actual room dimensions. A lighting professional can compare the proposed pattern with the fixture’s distribution before installation begins.
Sloped, vaulted, or soffited ceilings need their own review. A rigid grid may fight the ceiling shape or direct light away from the intended surface. Aligning every fixture with the room’s longest dimension can also produce the runway effect, especially in a galley kitchen. Breaking the plan into task-based groups usually creates a calmer composition.
Check the layout from several viewpoints. Stand at the main entrance, the dining area, and any opening toward a living room. Recessed lights that seem balanced above the island may form a distracting line when viewed from an adjoining space.
Before cutting the ceiling, mark proposed locations with removable tape. Compare those marks with cabinet doors, pendants, ceiling beams, vents, and access panels. This simple review can expose conflicts that aren’t obvious on a floor plan. For projects involving new wiring or relocated fixtures, review the plan with a kitchen electrical and lighting pro.
Trim size and beam spread
Trim size affects how prominent the fixtures look when they’re off. Beam spread affects how the light behaves when they’re on. Both choices belong in the layout discussion.
A ceiling crowded with large, high-contrast trims can feel busy. Smaller or visually quiet trims may help the ceiling recede, but appearance can’t be the only test. The selected fixture still needs to support the intended task and fit the ceiling conditions.
Review beam information from the fixture manufacturer. A narrow distribution can emphasize a countertop, cabinet face, or art wall. A wider distribution can soften transitions across a general work zone. Neither is automatically correct for every kitchen.
Think about overlap rather than isolated circles of light. The aim is a connected field that supports work without creating obvious bright spots. Draw the expected coverage on the plan, then compare it with counter edges, cabinet faces, and seating locations.
Wall cabinets make this review more specific. A fixture intended to illuminate a counter shouldn’t be placed solely for visual symmetry with the room centerline. Its position should respond to the cabinet projection and the person using the counter.
Finish color also changes the ceiling’s appearance. White trim may blend into a white ceiling, while dark trim makes every fixture more visible. That contrast can work in a deliberate design, but it also makes uneven spacing harder to ignore.
Choose the fixture family before finalizing ceiling openings. Don’t assume different products will produce the same visual result because their trims look similar. Compare the actual product information, dimming compatibility, installation requirements, and light distribution with the pro handling the project.
Layering with under cabinet and pendants
Recessed lights shouldn’t carry the entire kitchen alone. A layered plan assigns different jobs to downlights, under-cabinet lighting, pendants, and decorative fixtures.
Use recessed lighting for broad task support and circulation. Add under-cabinet lighting where wall cabinets sit above work surfaces. This gives the counter its own source instead of asking a ceiling fixture to solve every shadow. Our under-cabinet lighting guide explains how to plan that layer around cabinet runs and visible fixture placement.
Pendants can define an island or peninsula, but they shouldn’t compete with nearby downlights. Draw the pendant canopies, shades, and sightlines on the same ceiling plan. Then check whether recessed fixtures create accidental clusters around them.
Decorative lighting also needs breathing room. A strong pendant arrangement can act as the visual center while recessed fixtures stay quiet. If every ceiling element demands attention, the room may feel crowded even when each fixture looks good by itself.
Plan controls by activity. Food preparation, cleanup, dining, and evening circulation don’t always need the same light. Separate control zones let the room shift between those uses. Dimming can add flexibility, but the chosen fixtures, drivers, and controls need to work together. Have the electrical pro confirm product compatibility.
Also consider adjacent rooms. An open kitchen may share sightlines with a dining or living area. Matching brightness everywhere can flatten those spaces. Instead, plan a comfortable transition and decide which surfaces should lead the eye.
For island-specific placement, use our kitchen island lighting guide alongside the full ceiling plan. Pendant positions, seating, countertop work zones, and recessed lights should be resolved together.
Title 24 and what it means for you
Title 24 often enters the conversation when kitchen lighting changes, but the current kitchen-specific lighting requirements couldn’t be confirmed. Don’t rely on an old checklist, a fixture label alone, or requirements copied from another project.
Ask the matched professional which current rules apply to your scope and address. The California Energy Commission is the authority to check for current state energy materials. Product selection, controls, and project documentation should be reviewed against the requirements in force for that job.
Permit needs also depend on the work being proposed. Building permits may be required depending on the scope. A kitchen-specific permit trigger couldn’t be confirmed, so avoid assumptions based on project size or fixture count.
For work within the City of San Diego, use Development Services to confirm the current process. Projects elsewhere in San Diego County should be checked with the authority responsible for that property. Your remodeler can help identify the correct office, but the applicable authority determines the requirement.
Current electrical safety rules for kitchen circuits and protection couldn’t be confirmed. That means this guide doesn’t state circuit sizes, protection rules, or wiring methods. Those details should come from the current requirements and the licensed professional responsible for the electrical work.
You can verify a contractor through the CSLB License Check before signing a contract. License status confirms legal standing, not design quality, so also review the proposed fixture schedule, ceiling plan, control zones, and responsibility for permit questions.
When to call us
Call when your layout involves new wiring, relocated fixtures, changed cabinets, or coordination with an island and pendants. Modern Kitchen SD matches homeowners with licensed, independent local pros and performs no physical work itself. Call us at (858) 400-4623 and we’ll connect you with a licensed local kitchen remodeler.